Materials:
• ResinObsession Super Clear Resin
• 738 Cabochon Mold
• Castin’ Craft Mold Release Spray
• Reusable measuring cup or a Plastic cup
• Stir Stix
• Disposable Spoon (optional)
• White glitter
• Castin’ Craft transparent green dye
• Rolling pin
• Non-stick mat (like one used for cooking)
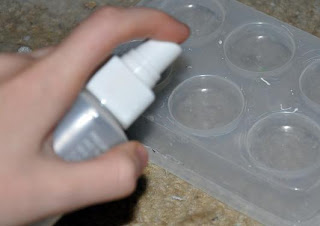
1) Spray the mold with conditioner and leave to dry.
2) Measure your resin into a disposable cup according to the directions. I like to measure mine in level teaspoons, but you can use the provided measuring cups. Mix well and leave to stand for a couple of minutes.
3) Add a small amount of dye to the mix until it is the color you want. Add just a pinch of white glitter and mix well - this is the secret to the realism!
4) Pour the mixture into the mold until half-full and leave to partially set. I left mine inside of a hot box or under a light bulb to speed up the process, but you can let it set in a normal environment. This mold is best because it gives nice sized pieces to work with - when half-full it give a realistic sized pendant.
5) The resin is ready to be manipulated when the surface is no longer wet, but the mixture is still very soft when pushing on the underside of the mold. Keep an eye on the curing as different room temperatures and situations change the speed that it takes to get to this stage. Pull the resin out of the mold with a blunt object (you can use the StirStix so not to damage your mould), any extra bits left inside can be picked off once fully cured.
6) Tear the resin into pieces if you want smaller pieces, or for a decent sized pendant leave the blob whole. Shape roughly with your hands and put on a non-stick mat. Don’t worry about fingerprints, this will slightly frost the surface which is a good thing, and most will be lost once fully cured as it does smooth out a bit more after this stage.
7) Use a rolling pin to lightly squish the piece on the drying mat into a flatter shape so to mimic the thickness of old glass.
8) Leave to set in a cool environment for at least 4-5 hours. Then you are free to drill and do as you wish with your faux sea glass!


Fantastic tutorial! Thanks
ReplyDeleteGemxxx
Only found this now. Must try it out asap. I like pieces made with sea glass and I really like working with resin.
ReplyDeleteGreat tutorial/idea. Thanks.
Nicole